
My first attempt to use gold leaf was purely out of curiosity. I’m always excited to work with new materials, and during the first year of school we had a project called “Illuminated Manuscripts”.
“An illuminated manuscript is a manuscript in which the text is supplemented by the addition of decoration, such as decorated initials, borders (marginalia) and miniature illustrations. An illuminated manuscript is not considered illuminated unless one or many illuminations contained gold foil or was brushed with gold specks, a process known as burnishing. By adding richness and depth to the manuscript, the use of gold in illuminations created pieces of art that are still valued today.” read more
I started by trying to recreate the letter “P” from the “Book of Kells” (“an illuminated manuscript Gospel book in Latin, containing the four Gospels of the New Testament together with various prefatory texts and tables. It was created by Celtic monks ca. 800 or slightly earlier.”)


 I had a lot of fun working with gold leaf, so I decided to make a tutorial afterwards.
(*Please note that I made this tutorial based on a few other tutorials, videos and articles I have read on this subject, as well as my “letter P” experiment. It is just the technique I had used, and I’m sure there are lots of other techniques out there.)
How to Apply Gold Leaf

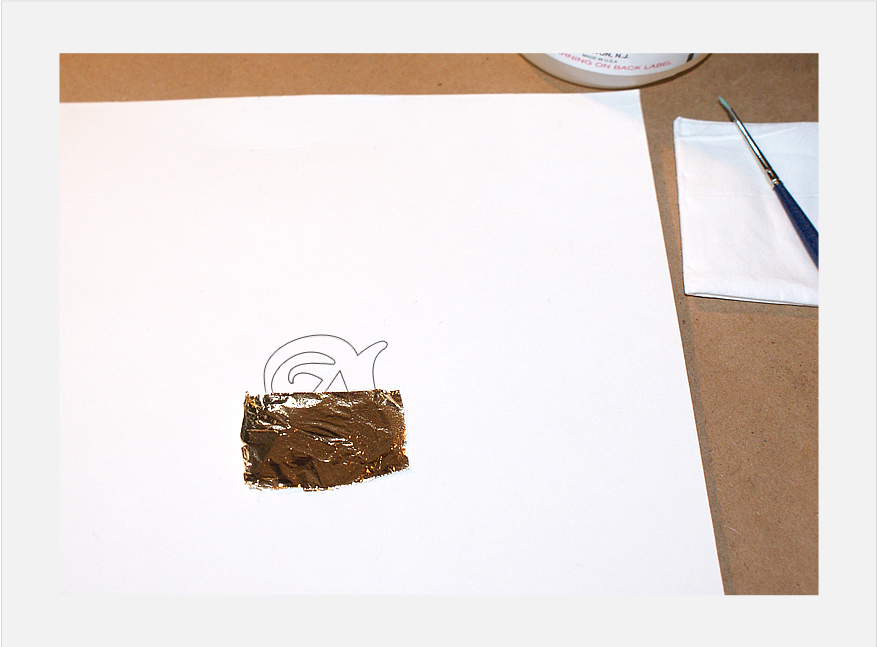
Use the Exacto Knife to cut and a cotton pad (or a tissue paper) to hold the Gold Leaf.

The Metal Leaf Sealer is easier to handle. It doesn’t dry out so fast and it is like watercolour, so you can work with small detail.
It’s up to you how much you want to cover at once.
A) You can cover everything with one leaf (a small shape without too much detail).
B) You can work on one small area at a time (a bigger shape or details).
* Apply Metal Sealer to one part of the shape, apply Gold Leaf, wait to dry, clean it, and then move to another area OR
*Apply Metal Sealer to one part of the shape and the Gold Leaf, then apply Metal Sealer and Gold Leaf to another area, and so on until the entire shape is covered. Clean everything at the end.
I prefer to work with one area at a time (and clean it) because I can keep track of how my shape is supposed to look like when I’m cleaning it.

Be careful not to go over the shape too many times. That is why I said it is important to remember your shape.
If you crack/rip off the Gold Leaf, you can go back at anytime and apply Metal Leaf Sealer and Gold Leaf over it.
Don’t worry if you can see the line where the Gold Leafs meet. You can hide it with a thin layer of Metal Leaf Sealer in the end. (Step 6)

Here is how my rough shape looks like.


Step 6: Seal the Gold Leaf
Apply GENTLY a thin layer of Metal Leaf Sealer over your final shape. It will set it in place and protect it.
You can use a small or a big brush. I would suggest to use a smaller brush and don’t go over the outline because it will be harder to clean. If you do go over with the sealer, just scrape it off with the Exacto Knife.
(You can always add/repair/change your shape with more layers of Gold Leaf. Just remember to seal it when you’re done).

Congratulations!
You finished your Illuminated shape.
Really easy, very rewarding and a lot of fun.
Below you can also see the "Illuminated Manuscript" project and how it came out.


“An illuminated manuscript is a manuscript in which the text is supplemented by the addition of decoration, such as decorated initials, borders (marginalia) and miniature illustrations. An illuminated manuscript is not considered illuminated unless one or many illuminations contained gold foil or was brushed with gold specks, a process known as burnishing. By adding richness and depth to the manuscript, the use of gold in illuminations created pieces of art that are still valued today.” read more
I started by trying to recreate the letter “P” from the “Book of Kells” (“an illuminated manuscript Gospel book in Latin, containing the four Gospels of the New Testament together with various prefatory texts and tables. It was created by Celtic monks ca. 800 or slightly earlier.”)


(*Please note that I made this tutorial based on a few other tutorials, videos and articles I have read on this subject, as well as my “letter P” experiment. It is just the technique I had used, and I’m sure there are lots of other techniques out there.)
How to Apply Gold Leaf
Step 1: What you need
You need: your board with the outline of a shape, Gold Leaf, Rubber Cement, Metal Leaf Sealer, Exacto Knife, a small brush, Q-tips, a tissue paper and a cotton pad.
Step 2: Cut/Prepare the Gold Leaf
Transfer the Gold Leaf onto a tissue paper and cut it into small pieces. I have found that small pieces are easier to handle, but if you want to cover a larger area, you can cut it into bigger pieces.Use the Exacto Knife to cut and a cotton pad (or a tissue paper) to hold the Gold Leaf.

Step 3: Apply Gold Leaf
With a small brush apply a thin layer of Rubber Cement (or Metal Leaf Sealer) on your shape where you want the Gold Leaf.The Metal Leaf Sealer is easier to handle. It doesn’t dry out so fast and it is like watercolour, so you can work with small detail.
It’s up to you how much you want to cover at once.
A) You can cover everything with one leaf (a small shape without too much detail).
B) You can work on one small area at a time (a bigger shape or details).
* Apply Metal Sealer to one part of the shape, apply Gold Leaf, wait to dry, clean it, and then move to another area OR
*Apply Metal Sealer to one part of the shape and the Gold Leaf, then apply Metal Sealer and Gold Leaf to another area, and so on until the entire shape is covered. Clean everything at the end.
I prefer to work with one area at a time (and clean it) because I can keep track of how my shape is supposed to look like when I’m cleaning it.
Step 4: Clean Your Shape
Roughly clean the excess of Gold Leaf with a Q-Tip.Be careful not to go over the shape too many times. That is why I said it is important to remember your shape.
If you crack/rip off the Gold Leaf, you can go back at anytime and apply Metal Leaf Sealer and Gold Leaf over it.
Don’t worry if you can see the line where the Gold Leafs meet. You can hide it with a thin layer of Metal Leaf Sealer in the end. (Step 6)

Here is how my rough shape looks like.

Step 5: Define Your Shape
Take the Exacto Knife and define the shape.
Step 6: Seal the Gold Leaf
Apply GENTLY a thin layer of Metal Leaf Sealer over your final shape. It will set it in place and protect it.
You can use a small or a big brush. I would suggest to use a smaller brush and don’t go over the outline because it will be harder to clean. If you do go over with the sealer, just scrape it off with the Exacto Knife.
(You can always add/repair/change your shape with more layers of Gold Leaf. Just remember to seal it when you’re done).

Congratulations!
You finished your Illuminated shape.
Really easy, very rewarding and a lot of fun.
Below you can also see the "Illuminated Manuscript" project and how it came out.


Hi, nice blog you have. I will send link to my son, who likes to be creative when he writes :)
ReplyDeleteLinda
These are just beautiful, and so inspiring! I always wondered how that marvelous creation, The Book of Kells, was created, and you have helped me to understand some of the mechanics. Beautiful job!
ReplyDeleteI am looking for the font of an illuminated script + calligraphy text to match to use as the first letter of each name and follow on with appropriate calligraph in the printable Book of the Dead of deceased members of our organisation, the Order of Malta. I am not really sure that I am in the right chatfest but someone may know how to get or buy these fonts or someone who may have done something similar.
ReplyDeleteIt's amazing! Thanks for the instructions I'll definitely do this one day
ReplyDelete